

Hi friends! Have you ever looked down at your hands and just sighed? We’ve all been there. You spend an hour painting your nails, only for them to chip the moment you try to open a soda can or zip up your jacket. It is honestly so frustrating! If you are tired of the constant maintenance but still want those Pinterest-worthy, cute nails, then you are in the right place. Today, I’m going to introduce you to the absolute game-changer of the manicure world: dip powder.
If you’ve been scrolling through social media lately, you’ve probably seen those satisfying videos where someone dips their finger into a jar of colorful dust and magically emerges with a perfect manicure. It looks like magic, doesn’t it? Well, it’s not magic—it’s dip powder! But what exactly is it, and why is everyone suddenly obsessed with it? Let’s break it down together in a way that actually makes sense.
What Exactly Is a Dip Powder Manicure?
To put it simply, dip powder is a hybrid between traditional nail polish and salon acrylics. Think of it as the “Goldilocks” of the nail world. It’s stronger than a gel manicure but lighter and more flexible than traditional acrylic extensions. Most people love it because it gives you incredibly cute nails that can last anywhere from three to five weeks without a single chip.
The technical name for this process is often “SNS,” which actually stands for Signature Nail Systems (the brand that pioneered the tech). The process involves a cyanoacrylate—which is a medical-grade adhesive—and a very finely milled acrylic powder. Instead of painting with a liquid color, you apply a clear base and “dip” your nail into the pigment.
The best part? Unlike gel polish, dip powder does not require a UV or LED light to cure. If you’re someone who worries about skin exposure to UV rays, this is a huge win. The layers harden on their own using an “activator” liquid, leaving you with a rock-hard finish that feels lightweight and natural.
The Step-by-Step Journey to Cute Nails
I remember the first time I tried to do this at home. I was a bit nervous about the steps, but once you get the rhythm down, it’s actually quite fun. Here is how the magic happens, whether you are sitting in a salon chair or trying a DIY kit at your kitchen table.
1. Preparation is Everything: You can’t have cute nails without a good canvas. The nail tech will start by pushing back your cuticles and buffing the surface of your natural nail. This removes oils and helps the powder stick.
2. The Base Coat: A clear liquid base is applied to the nail. It looks a bit like clear nail polish, but it acts more like a magnet for the powder.
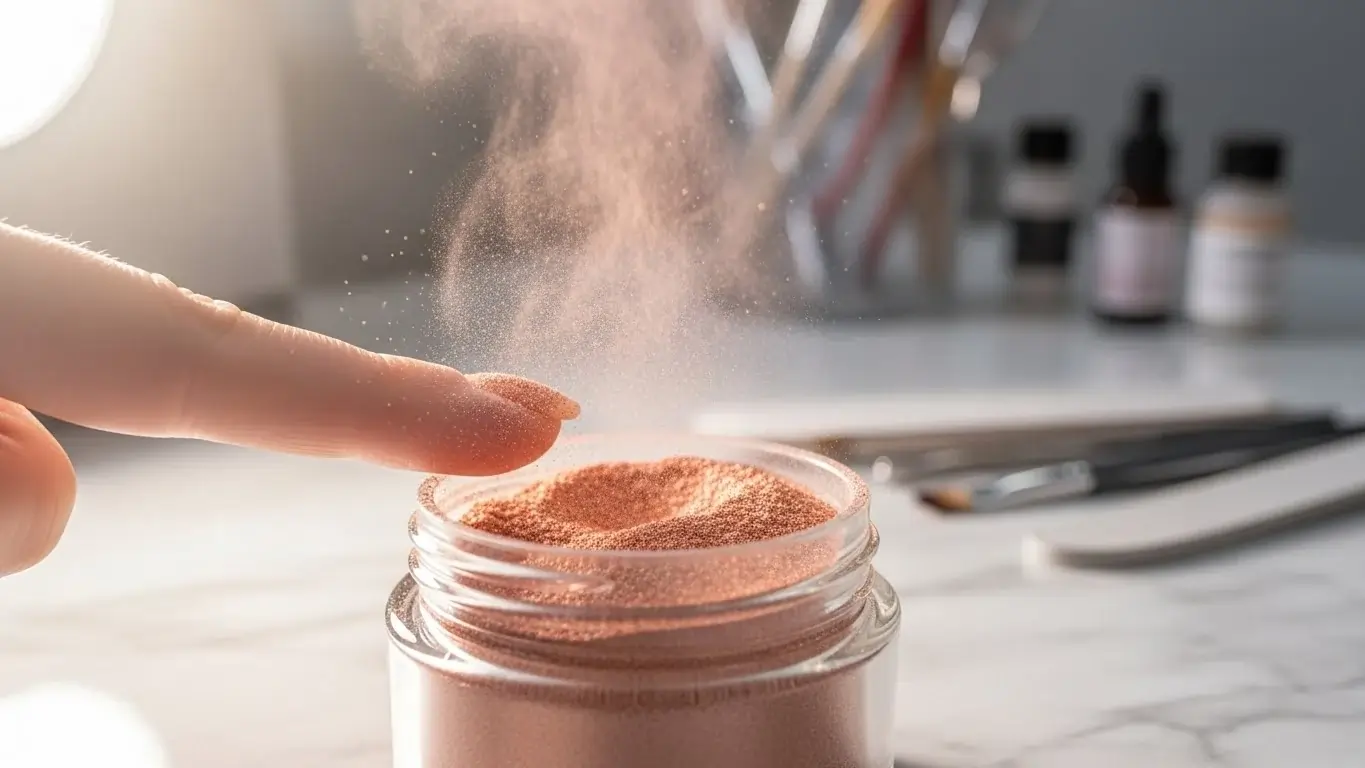
3. The Big Dip: While the base is wet, you dip your finger into the jar of colored powder at a 45-degree angle. You tap off the excess, and suddenly, you see the color starting to take shape!
4. Repeat for Strength: Usually, this process is repeated two or three times. This building of layers is what makes the manicure so durable.
5. The Activator: This is the “magic” liquid. Once the powder layers are on, a brush-on activator is applied. This creates a chemical reaction that bonds the powder and the base together into a hard shell.
6. Buffing and Shaping: Since the powder can sometimes look a bit “chunky” after dipping, the tech will file and buff the surface until it’s perfectly smooth and slim.
7. The Top Coat: Finally, a shiny top coat is applied to seal everything in. Within two minutes, they are completely dry to the touch!
Why Is Everyone Switching to Dip?
You might be wondering, “Why should I pick this over my trusty gel polish?” It’s a fair question! The main reason people are flocking to dip powder to achieve cute nails is the sheer longevity. If you have a busy job, kids, or a hobby that’s tough on your hands (like gardening or rock climbing), dip powder is your best friend.
Another huge benefit is the thickness. If you have weak, brittle nails that tend to snap off the moment they grow past your fingertips, dip powder acts like a protective shield. It allows your natural nails to grow underneath without breaking. It’s essentially armor for your hands, but make it fashion!
Also, let’s talk about the “no UV” factor again. Many of us are becoming more conscious of skin health. While gel lamps are generally safe, skipping the light entirely is a nice piece of mind. Plus, there’s no “tacky” layer to wipe off at the end. Once that top coat is on, you can dig into your purse for your keys immediately without fear of smudging.
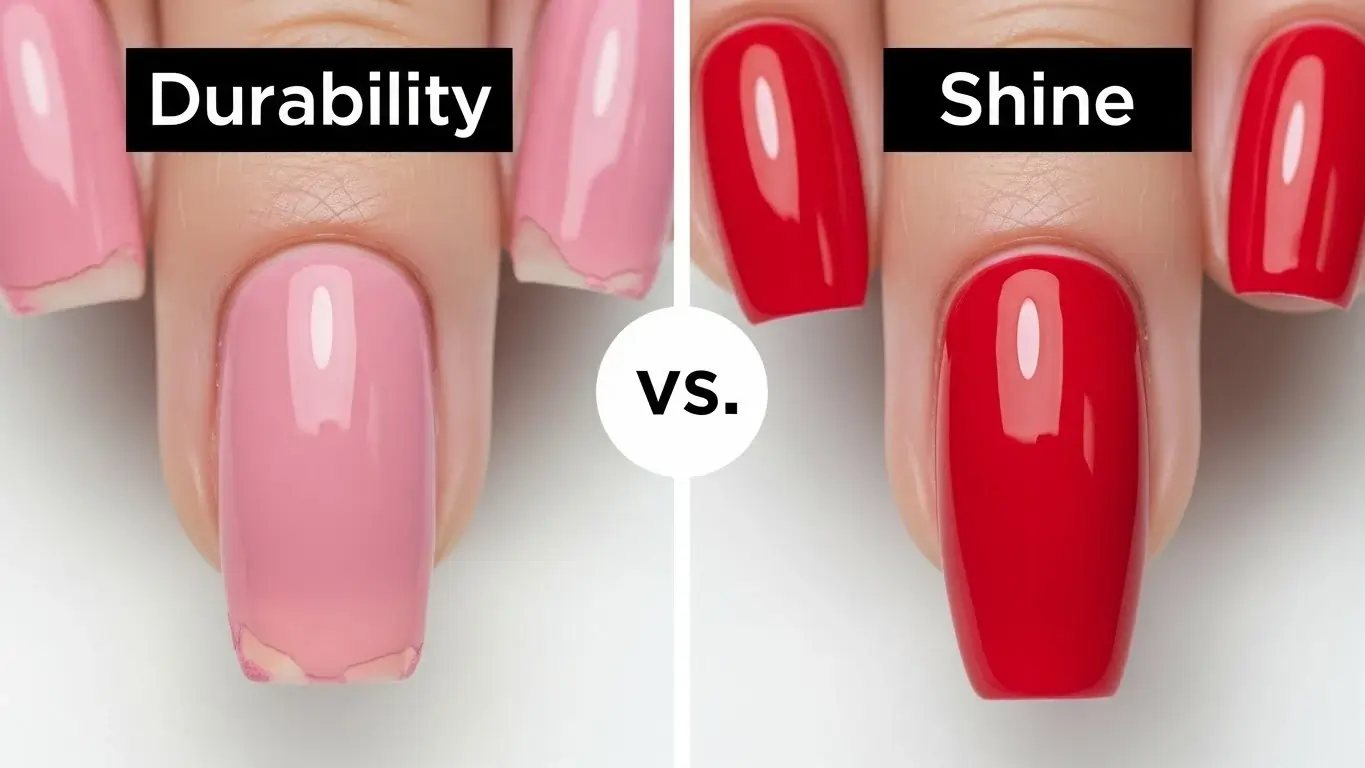
Dip vs. Gel vs. Acrylic: The Great Debate
If you’re trying to decide which path to take for your next set of cute nails, here is a quick comparison to help you choose.
- Gel Manicures: These are great for a natural look and are very flexible. However, they usually only last 2 weeks and can peel if you have oily nail beds.
- Acrylic Nails: These involve a liquid monomer and powder polymer mixed on a brush. They are the strongest option and are great for adding length, but they can be very heavy and have a strong chemical smell during application.
- Dip Powder: This sits right in the middle. It provides the strength of acrylic but the “thinness” of gel. It’s odorless (mostly) and doesn’t require a lamp.
Personally, I find that dip powder hits that “sweet spot.” It feels more premium than a basic polish change but less “high-maintenance” than a full set of acrylic extensions.
Pro Tips for Maintaining Your Cute Nails
So, you’ve spent the time and money to get a gorgeous set of cute nails. How do you make sure they stay looking fresh for a full month? It’s easier than you think, but it does require a little bit of love.
First, cuticle oil is your absolute best friend. Even though the dip powder is tough, your natural nail and the skin around it can get dry. Applying oil every night keeps the manicure flexible and prevents lifting at the edges.
Second, avoid using your nails as tools! I know it’s tempting to use them to scrape off a sticker or pry open a container, but that’s how cracks happen. Treat your nails like jewels, not tools. If you treat them well, your cute nails will stay looking like you just walked out of the salon for weeks on end.
Lastly, be mindful of harsh chemicals. If you’re cleaning the house with bleach or strong detergents, throw on a pair of rubber gloves. These chemicals can sometimes dull the shiny top coat of your dip manicure over time.
The Health Factor: Is It Safe?
I want to be totally honest with you because that’s what friends do. There has been some chatter about whether dip powder is “healthy.” The truth is, like any nail enhancement, the safety lies in the application and the removal.
The “dip” part can be a little unsanitary if a salon has multiple people dipping their fingers into the same jar. To ensure you’re getting cute nails safely, look for a salon that either pours the powder over your nail or brushes it on. This prevents any cross-contamination.
The most important thing to remember is that the powder itself doesn’t damage your nails—the removal process does. If you try to peel or pick off your dip powder when it starts to grow out, you will take layers of your natural nail with it. This leads to thin, painful nails. Always, always soak them off properly!
How to Remove Dip Powder Without Damage
When you are ready for a new color or just want to go natural for a bit, don’t reach for the metal scraper. To keep your natural nails healthy while enjoying cute nails, follow the “Soak, Don’t Scrape” rule.
You’ll need 100% pure acetone, some cotton balls, and aluminum foil. First, use a coarse nail file to sand down the shiny top layer of the dip. This “breaks the seal” and allows the acetone to penetrate the powder. Then, soak the cotton balls in acetone, place them on your nails, and wrap them in foil.
Wait about 15 to 20 minutes. I usually use this time to catch up on a podcast or watch a YouTube video. When you take the foil off, the powder should have a “gummy” consistency and slide right off with a paper towel. If it’s still hard, soak for another 5 minutes. Your nails will thank you for being patient!
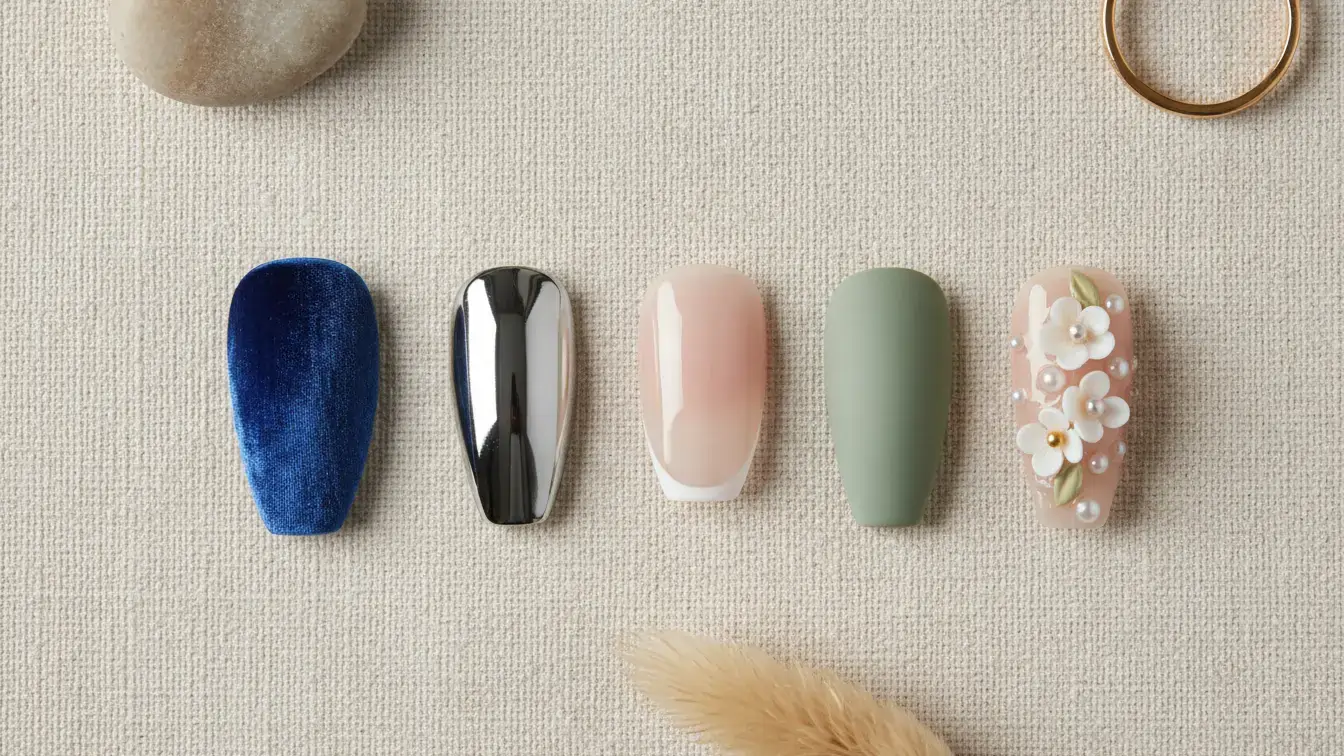
What’s Trending for Cute Nails in 2026?
Since we are looking ahead, what’s going to be “in” for cute nails this year? We are seeing a huge shift toward “texture” and “depth.”
1. Velvet Effects: Using magnets with special dip powders to create a shimmering, velvet-like finish.
2. Chrome Overlays: Applying a metallic chrome powder over a dip base for a futuristic, mirror-like glow.
3. Earth Tones: Soft sage greens, terracotta oranges, and “cloud” greys are replacing the neon colors of the past.
4. Micro-French: A very thin, delicate line at the tip of the nail. It looks incredibly classy and clean.
Whatever style you choose, the versatility of dip powder means you can experiment with almost any design and know it will stay put.
Summary and Final Thoughts
We’ve covered a lot today, haven’t we? From understanding the chemistry of the powder to learning how to soak it off safely, you are now a total pro on the subject. Dip powder is truly one of the best ways to maintain cute nails without the stress of daily touch-ups. It’s durable, beautiful, and much kinder to your skin than UV-based systems.
If you are tired of your polish chipping before the weekend even starts, I highly encourage you to give dip powder a try. Whether you go to a professional or try a kit at home, the results are so worth it. There is just something about a fresh manicure that makes you feel like you can take on the world!
Call to Action
I would love to hear from you! Have you tried dip powder before, or are you still a gel devotee? What is your go-to color when you want to feel confident? Drop a comment below and let’s chat! If you found this guide helpful, feel free to explore our website for more stories and beauty tips to keep you feeling your best.
Frequently Asked Questions (FAQs)
1. How Long Does a Dip Powder Manicure Usually Take?
In a salon, a full dip powder set usually takes between 45 minutes and an hour. If you are doing a complex design or adding extensions, it might take a bit longer, but the result for your cute nails is worth every minute.
2. Can I Do Dip Powder Nails at Home?
Yes, absolutely! There are many high-quality starter kits available. Just make sure to follow the instructions carefully and work in a well-ventilated area, as the activator can have a slightly strong scent.
3. Does Dip Powder Ruin Your Natural Nails?
Not if it’s applied and removed correctly! The damage usually comes from “picking” the powder off or over-filing the natural nail during prep. If you are gentle and soak them off with acetone, your nails will stay healthy.
4. How Often Should I Get My Dip Nails Redone?
Most people find that their cute nails start to show a “gap” at the cuticle after about 3 weeks. While the powder can stay on for 5 weeks, it’s usually best to get them refreshed every 3 weeks to maintain the structural integrity and look.
5. Is Dip Powder Better Than Acrylic?
It depends on what you want! Dip powder is generally thinner and more flexible, making it feel more natural. Acrylic is better if you want very long, dramatic extensions. For everyday wear, most people prefer the feel of dip.
For more interesting blogs visit: https://almondnailsideas.com/