

You have seen Almond Nails everywhere—on Instagram, on celebrities, and on your favorite influencers. Almond Nails look so clean, classy, and stylish. The good news is you do not need to visit any salon at all to get beautiful Almond Nails at home.
Learning how to shape almond nails at home takes just a few minutes. You only need simple tools. a steady hand. and the right steps to follow.
What Are Almond Nails
Almond nails have a slim body with a soft rounded tip at the top. They are not too sharp like stiletto nails. Not too flat like oval nails. They sit right in the middle. which is why so many people love them.
This shape makes your fingers look longer. It makes your hands look slimmer. Short nails. long nails. wide fingers. slim fingers. this shape works on every single hand type out there.
Why People Love This Shape So Much
It looks like you just walked out of a fancy salon. It feels elegant every single day. Going to a wedding. a dinner. or just the grocery store. your hands always look put together with this shape on.
Tools You Need Before Starting
Getting the right tools ready saves you a lot of trouble later. Here is what you need.
| Tool | Why You Need It |
|---|---|
| Fine grit nail file | Shapes the sides and tip |
| Nail buffer | Smooths out rough edges |
| Nail clippers | Trims length before filing |
| Cuticle pusher | Preps the nail bed properly |
| Cuticle oil | Keeps nails healthy after work |
| Washable marker | Marks the center for even shaping |
| Clear top coat | Locks and protects the shape |
A glass nail file is way better than a regular emery board. It seals the nail edge while you file. That means your nails break and peel far less often.
How to Shape Almond Nails at Home Step by Step
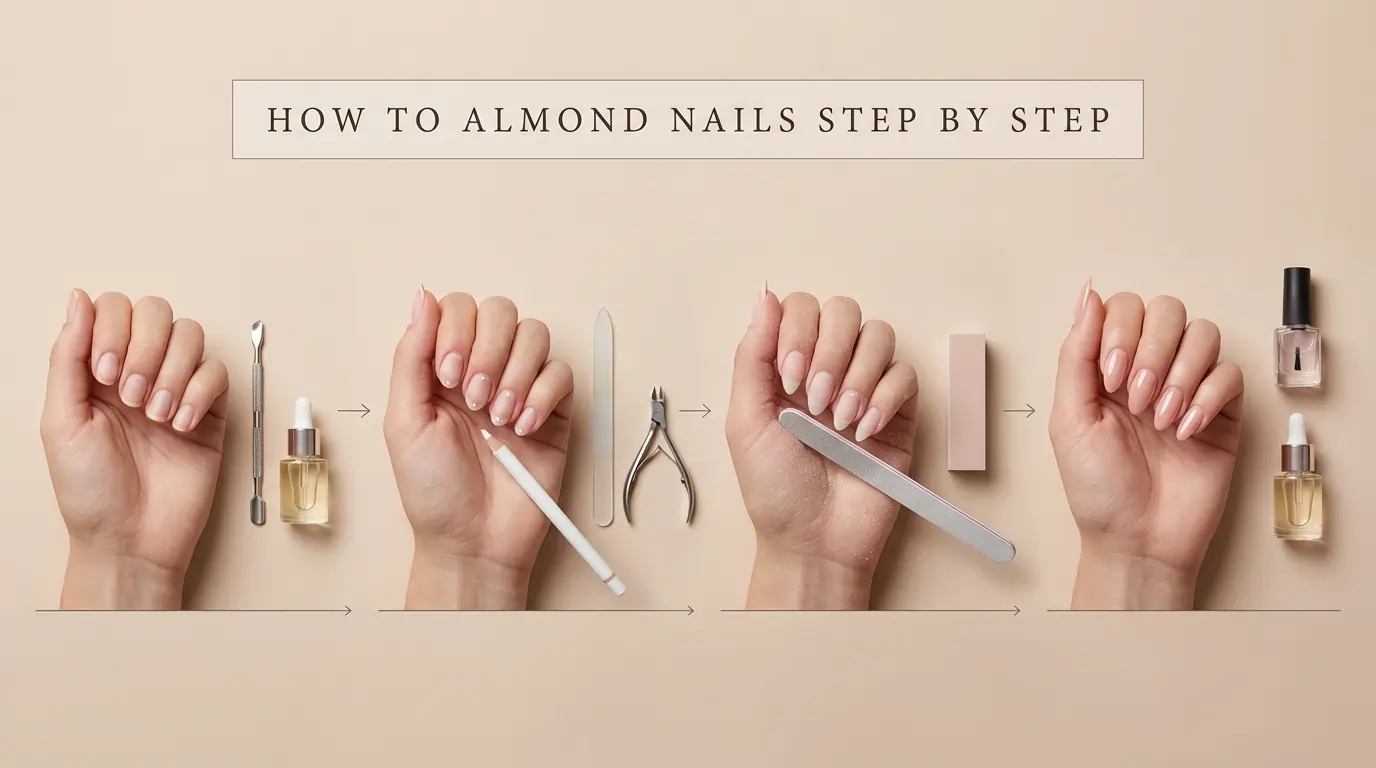
Step 1. Prep Your Nails First
Start with completely clean and dry hands. Push back your cuticles gently using a cuticle pusher. Remove every bit of old nail polish from each nail. Check that all your nails are the same length before you begin filing anything. Uneven starting lengths always give uneven final results.
Step 2. Mark the Center of Every Nail
Take your washable marker and place a tiny dot right at the center tip of each nail. That small dot becomes your guide for the whole process. It shows your file exactly where both sides need to meet. This one simple trick alone makes everything so much easier and more accurate.
Step 3. File Both Sides Toward the Center
Place your file at the corner of the nail. Angle it diagonally toward that center dot you made. Move the file in one direction only. Never go back and forth. Do 3 to 4 strokes on one side. Then move to the other side and do the same. Switch back and forth slowly. Check your progress after every few strokes. Never rush this part at all.
Step 4. Shape the Tip Into a Gentle Point
Now give your full attention to the tip of the nail. File it into a soft rounded point. Think of the actual shape of a real almond. Not a sharp needle point. Hold your file at a small angle and press very lightly. Look at the nail from the side. Then look from the top. You want a smooth gentle curve that ends softly.
Step 5. Bevel the Nail Edges
Most beginners skip this step completely. Please do not do that. Hold your file standing straight up vertically against the tip of the nail. Buff it gently across the edge. This small step locks all the nail layers together tightly. It stops the edges from peeling and splitting later. This is exactly what gives that clean professional salon finish.
Step 6. Buff Then Moisturize
Use your nail buffer to gently smooth every single edge on each nail. Work lightly. Over buffing makes nails thin and weak. After buffing wash your hands with clean water. Massage cuticle oil into each nail and the skin around it. Finish by applying a clear top coat to seal the shape and add shine.
Mistakes That Ruin Your Almond Shape
These mistakes happen to beginners all the time. The good thing is they are all very easy to avoid.
Filing back and forth damages your nail structure very quickly. Always move your file in one direction. every single time.
Not checking from multiple angles is how uneven nails happen. Look from the top. from the side. and from the tip. Both hands must match each other.
Making the tip too sharp is a fast way to break your nails. Keep that tip rounded and soft. not pointy like a stiletto shape.
Skipping the prep step makes shaping much harder than it needs to be. Always start with clean dry nails. no exceptions.
Filing too much from one side ruins the symmetry immediately. Do a few strokes then switch sides. never stay on one side too long.
How to Keep Your Almond Shape Fresh
Getting the shape right is just the beginning. Keeping it looking great every day takes a little bit of regular care.
- Massage cuticle oil or hand cream into your nails every single night before sleeping
- Always wear rubber gloves when washing dishes or using any cleaning products
- Apply a strengthening base coat under your nail color every time
- Fix any rough edges or small chips right away using a fine grit file
- Take biotin and vitamin E regularly to build stronger nails from the inside
FAQ’s
Do I need long nails to get almond shape?
No you do not. Short nails work perfectly fine too. Just keep the tip a little less pointed anad the shape still looks beautiful on shorter lengths.
What grit nail file works best for this shape?
A 180 to 220 grit file gives the most control. Natural nails need a softer emery board. Gel or acrylic nails need a stronger board file for better results.
How much time does this whole process take?
Your very first time will probably take around 15 minutes. After two or three practice sessions you can easily finish everything in under 10 minutes.
Can I do almond nails without extensions?
Absolutely yes. Natural nails work great for this shape. Just make sure your nails grow a tiny bit past the tip of your finger before you start shaping.
Why do my almond nails always look uneven?
You are most likely filing too fast without stopping to check. Slow down. use the center dot marker trick. and look at your nails from every angle as you go.
Conclusion
Shaping almond nails at home is honestly much easier than most people expect. You just need the right tools. the right steps. and a little bit of practice. Try it once or twice and your hands will start doing it naturally without even thinking.
No salon visit needed. No expensive appointment required. Just grab your nail file this weekend and give yourself the beautiful almond nail shape you have always wanted. Your hands deserve that extra care and attention every single day.